Disclaimer: In alignment with our business plan to minimize product costs for our customers, we may incorporate affiliate links.If a purchase or usage occurs through these links, we may receive compensation at no additional cost to the customer. Additionally, any discounts available through affiliate links are determined by the respective companies. If customer going to make a purchase, we encourage customers to verify any applicable discounts.
Introduction: By creating this Blog-Automation (for FREE), you will be able to create and also post new blog-post on your website automatically without any human intervention,
Set-up automation and forget about it, AI will take care of your work for months.
🌟 You can automate almost any type of blog work, but we are now going to focus on – how can you create automation for Creating andPosting a new blog post everyday, without any human intervention needed.
Let's Start Automation
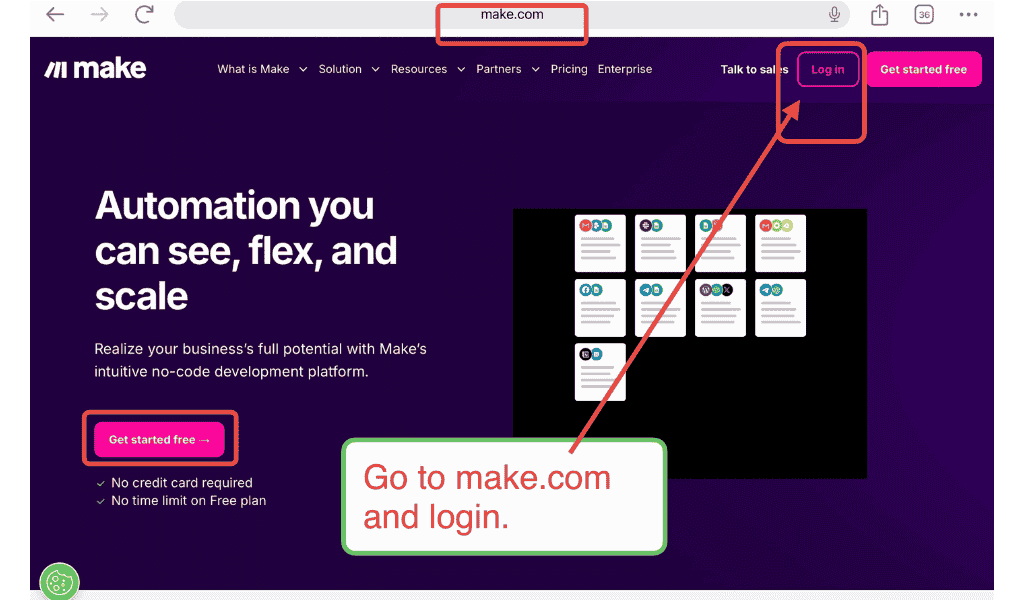
Step 1: Go to make free automation and click login or Get started free as shown in image below.
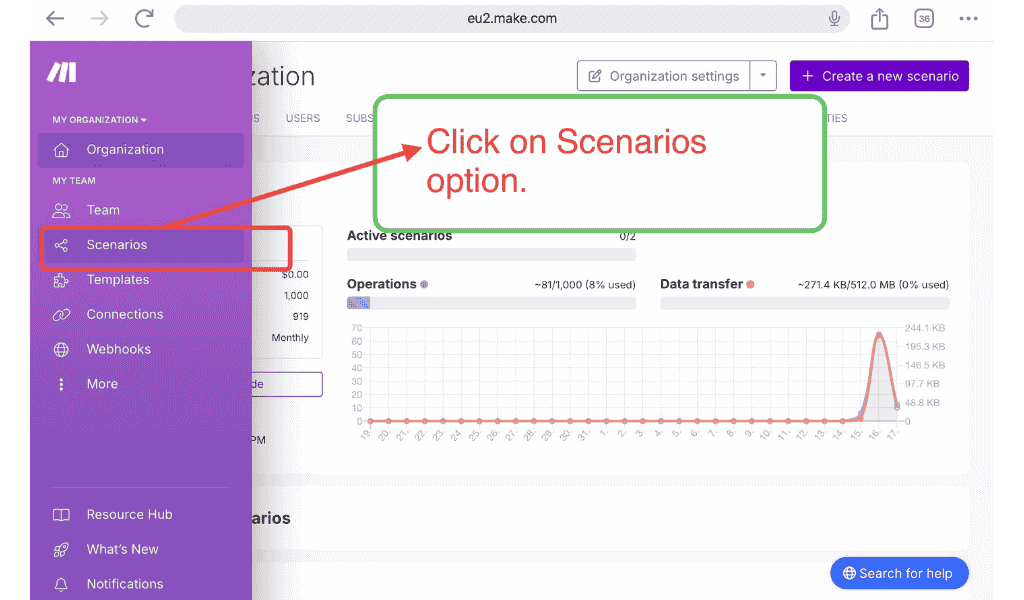
Step 2: After login click Scenarios from sidebar, as in image below.
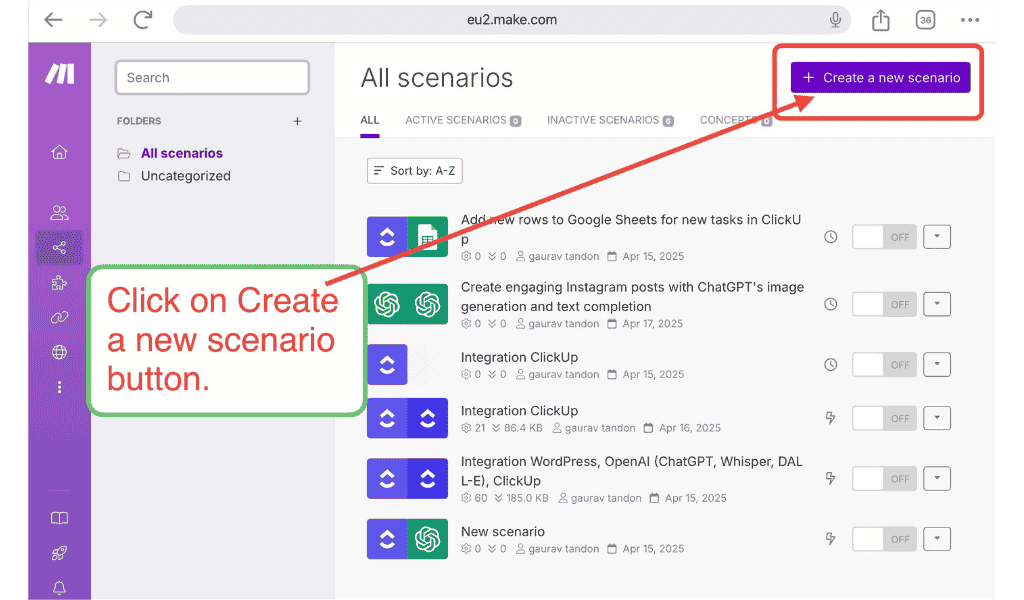
Step 3: Then click on Create a new scenario.
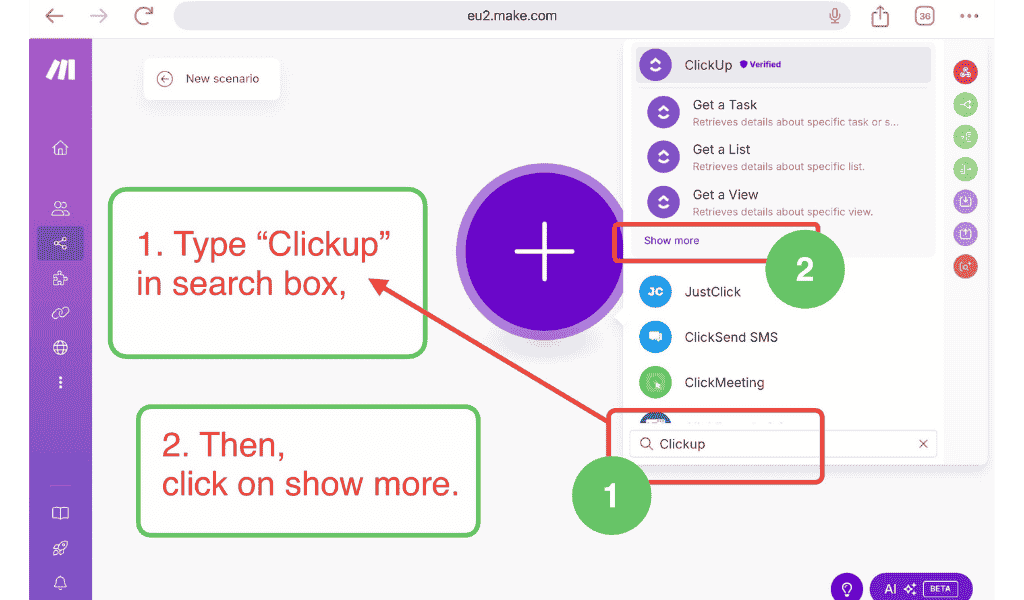
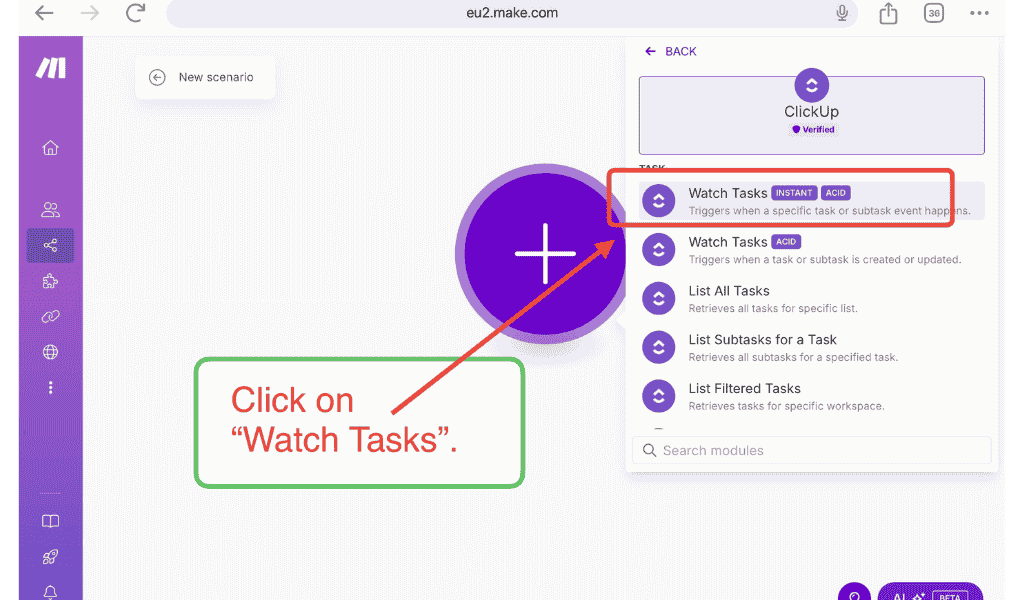
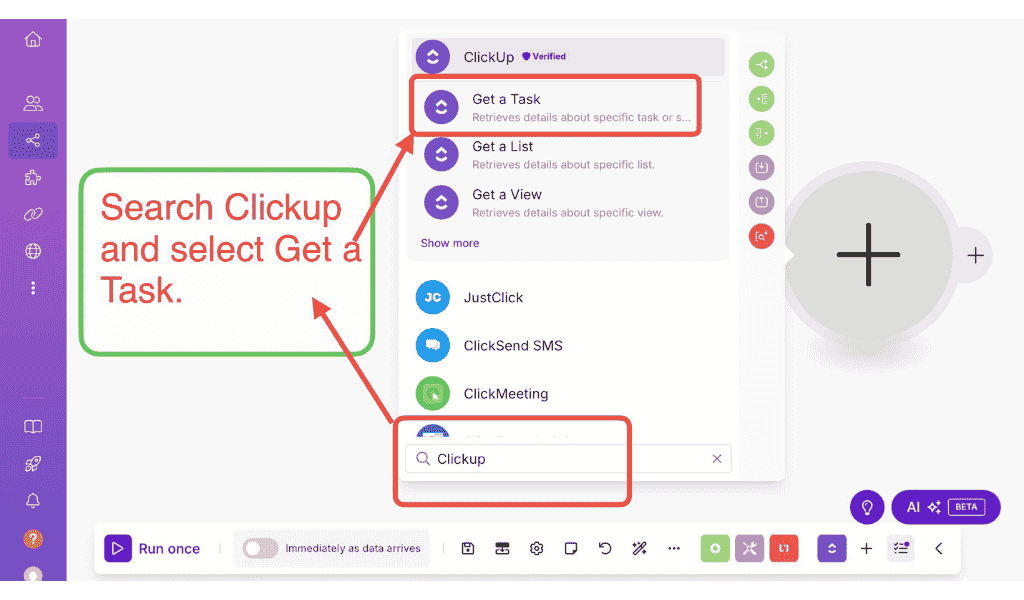
Step 4: Click + icon and search for Clickup and then click on Show more.
Step 5: Click on Watch Tasks, as shown in image below.
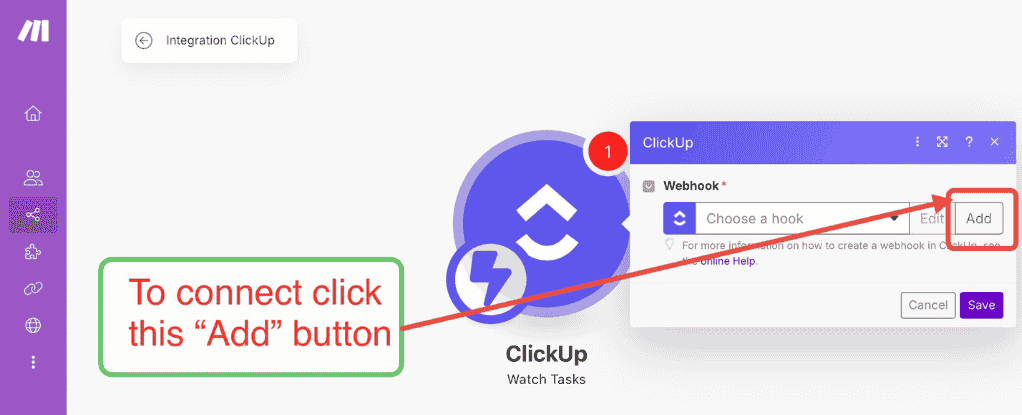
Step 6: Click on Add button to connect this make-automation with Clickup.
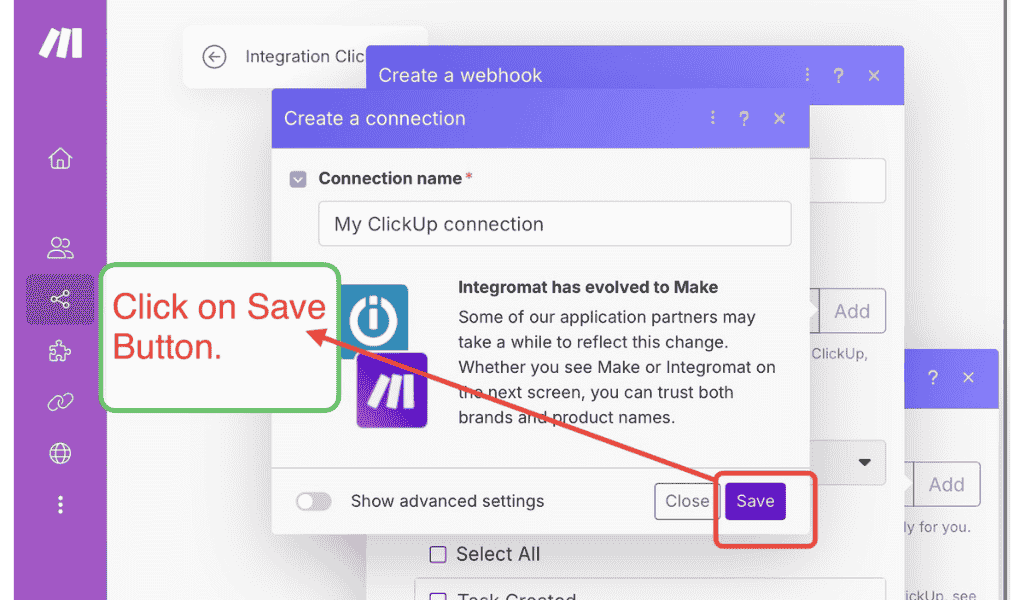
Step 7: Click on Save button.
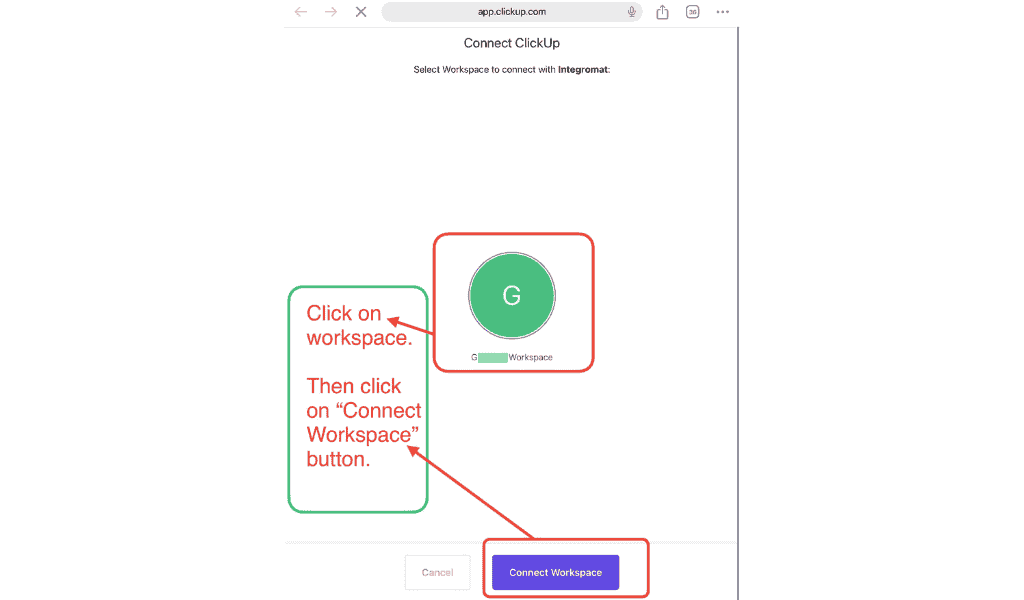
Step 8: A new clickup page will open, Select your workspace, then click on Connect workspace.
Step 9: Go back to make website and click on drop-down ans select your workspace.
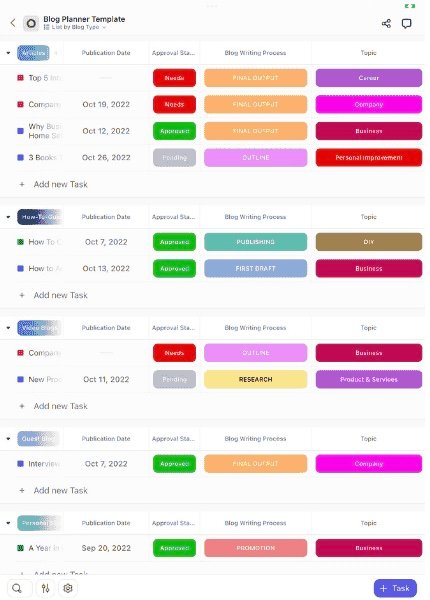
Step 10: You must have clickup task created beforehand (You can also use “blog planner template” you crated in Part 1).
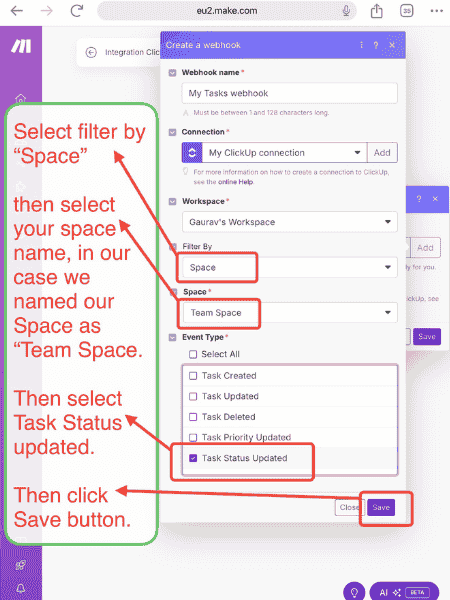
Select Space(in filter by), then select your space name(in our case we have named our space as Team Space).
Then, select Task Status Updated.
Click on Save Button.
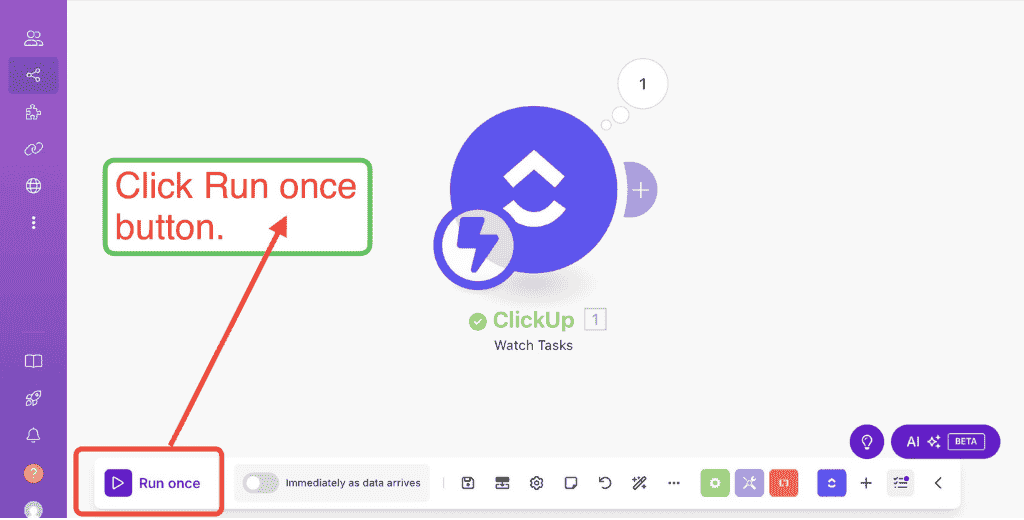
Step 11: Click on now Run once button, as shown in below image.
Then go to clickup template you have created in Part 1 or any other template of your choice but make sure you go to the same clickup space you have entered in step 10, like in our case we can choose any template or task contained in “Team Space”.
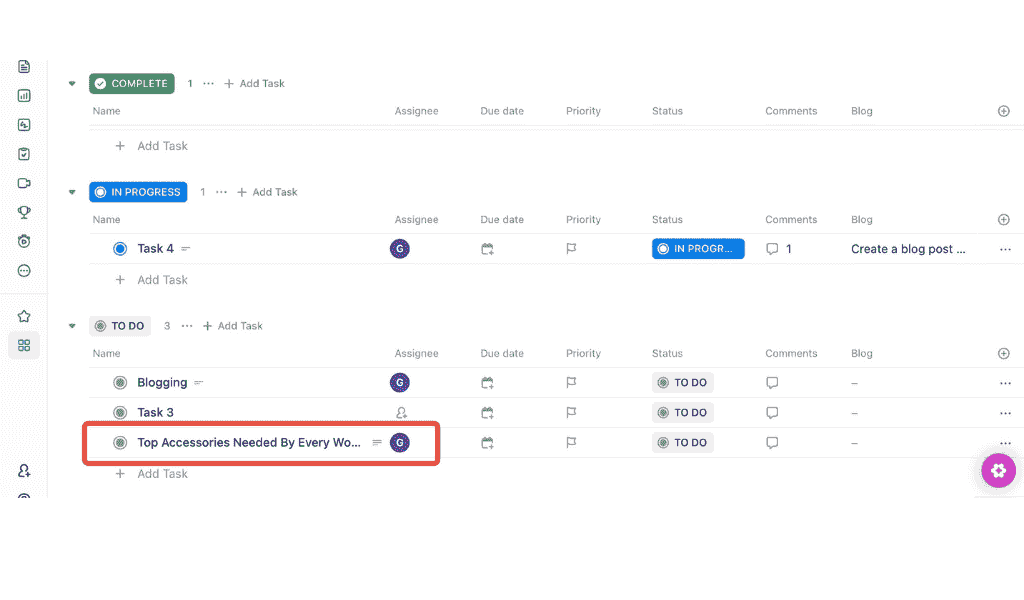
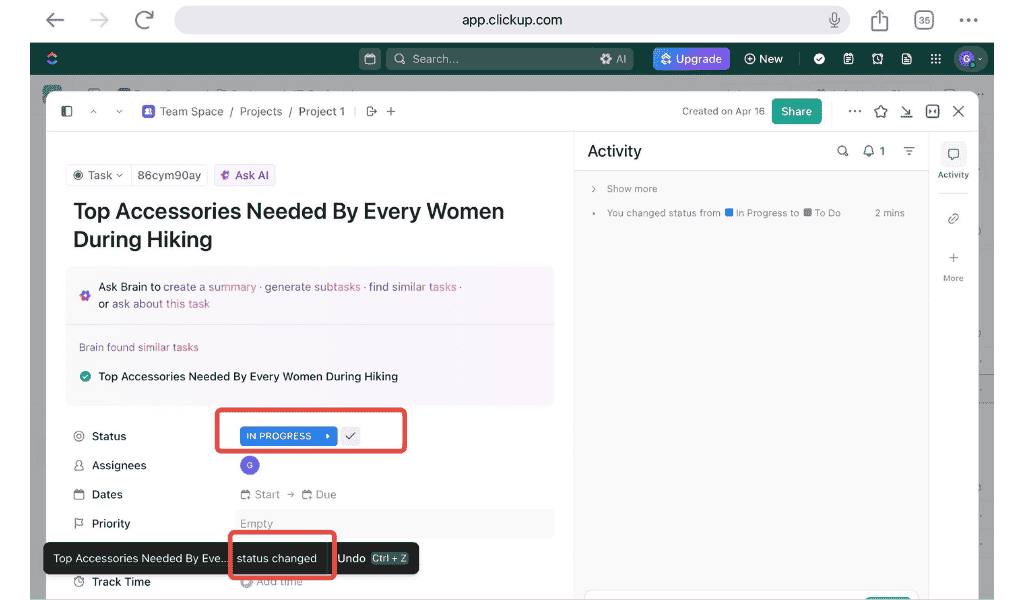
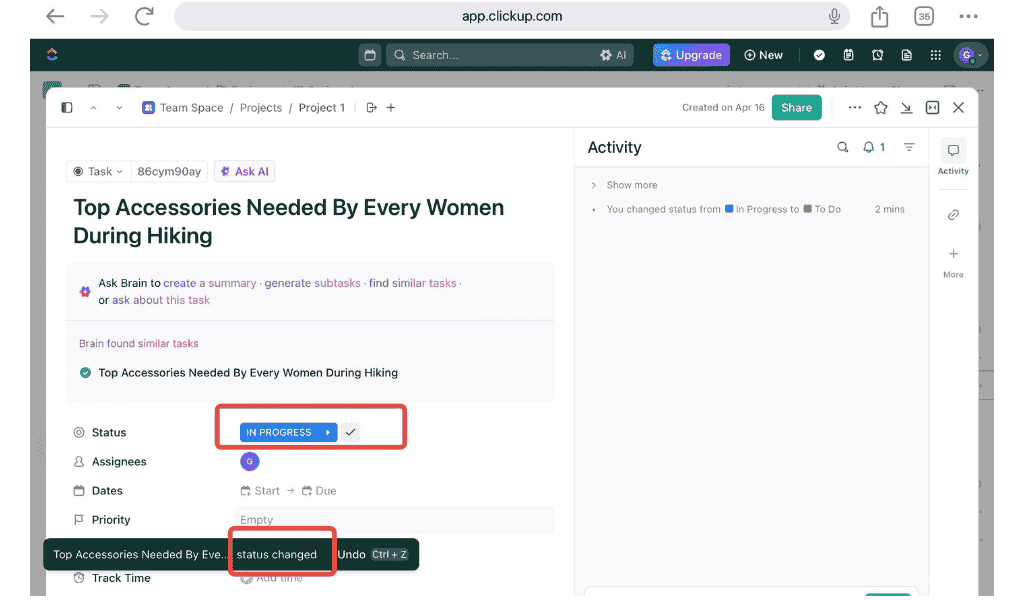
Step 12: In image given below we have created a new task within Team Space with name “Top Accessories Needed By Every Women” and we have given “ChatGPT Prompt” in its description(If you not know how to edit description, you should then read the “Get Started Guide” you got in “Blog-Planner” template in Part-1).
Click on this Task.
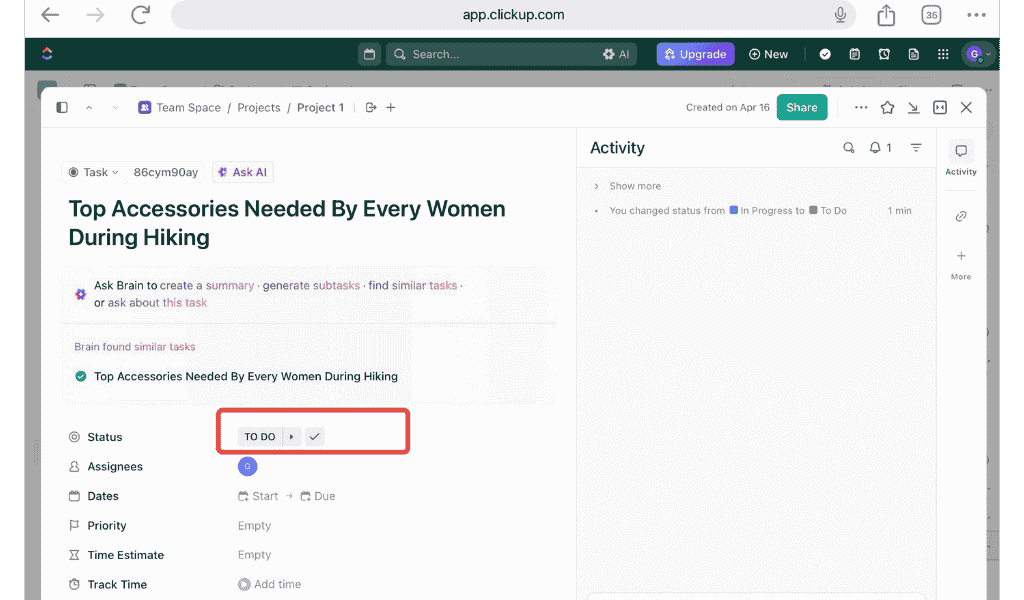
Step 13: You will get see Status heading with a drop down saying TO DO, we have to change this status to in progress or any other of your own choice.
Step 14: After changing status to IN PROGRESS Will see status changed notification.
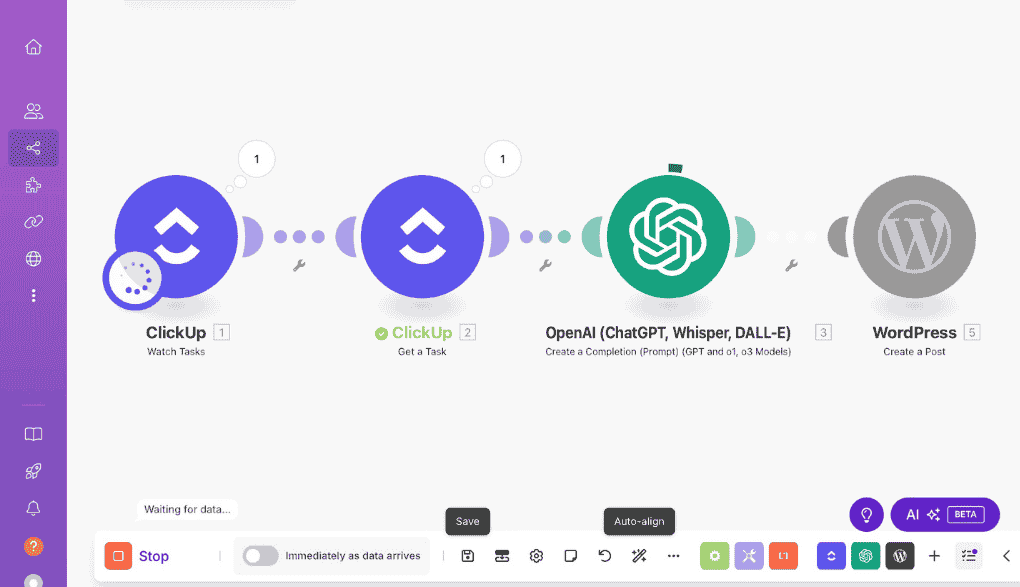
When you do this the Automation in make.co will automatically start.
Step 15: Now Go back make.com, you will see a notification as in below image, click this notification.
Step 16: You will then see Event: taskStatusUpdated and Task ID: something like in image “86cym90ay”.
Copy this Task ID as you will have to paste it in next steps.
Step 17: Click + icon look image given below for reference, after clicking a popup will open.
Step 18: Click on now search, and search for Clickup, then click on Get a Task.
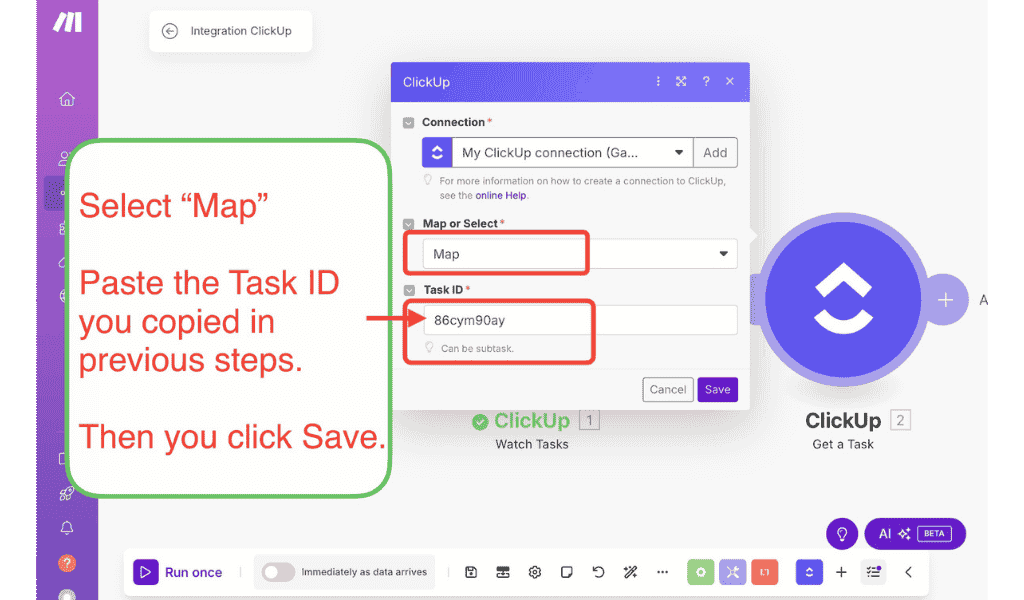
Step 19: Select Map, paste the Task ID you have copied earlier and then click Save.
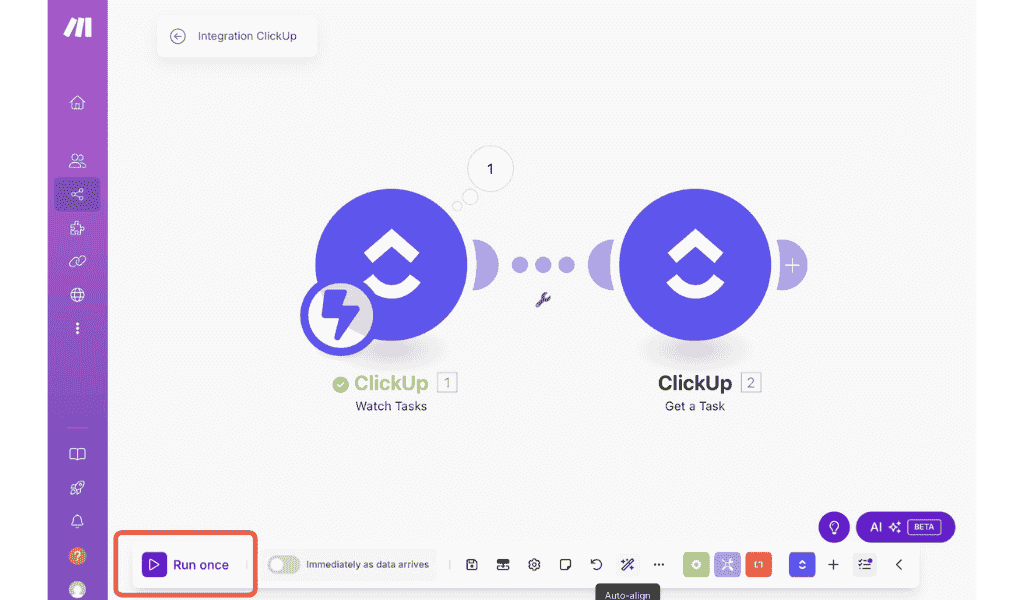
Step 20: Click on now Run once button.
Step 21: Like before, open Clickup and change status from To Do to In Progress.
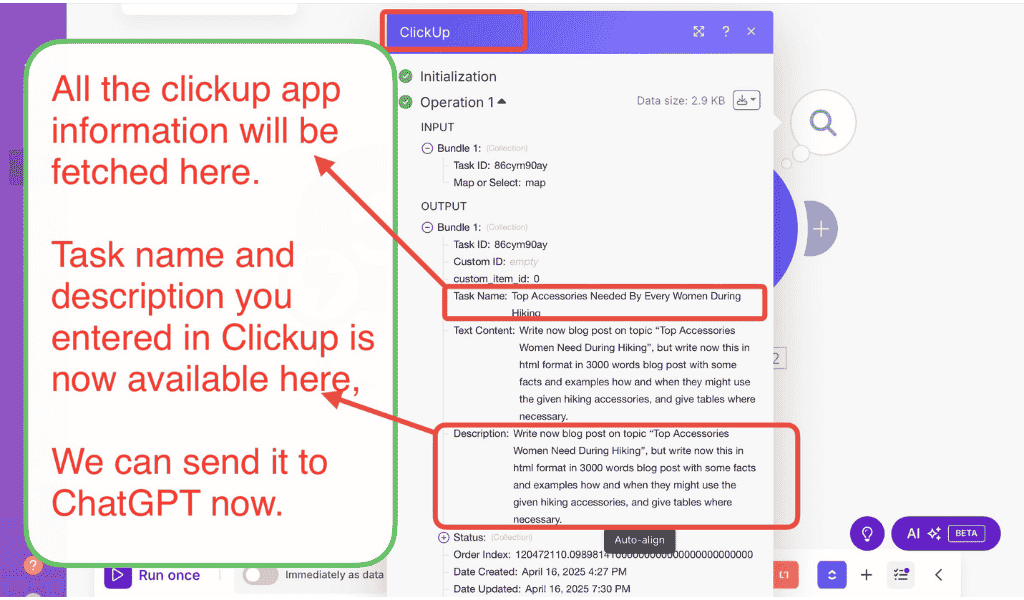
Step 22: Then like you have done before: Click on notification icon(above clickup get a task) in make.com. And you will see something like image below, it successfully fetched data(like Task name, description) from Clickup, it means your make.com and clickup connection is correctly setup.
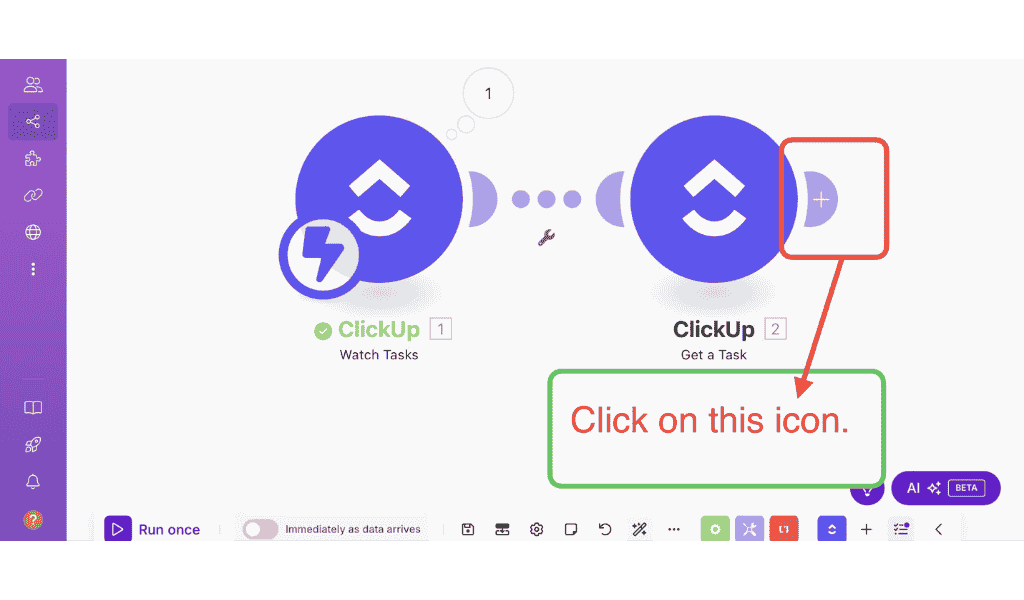
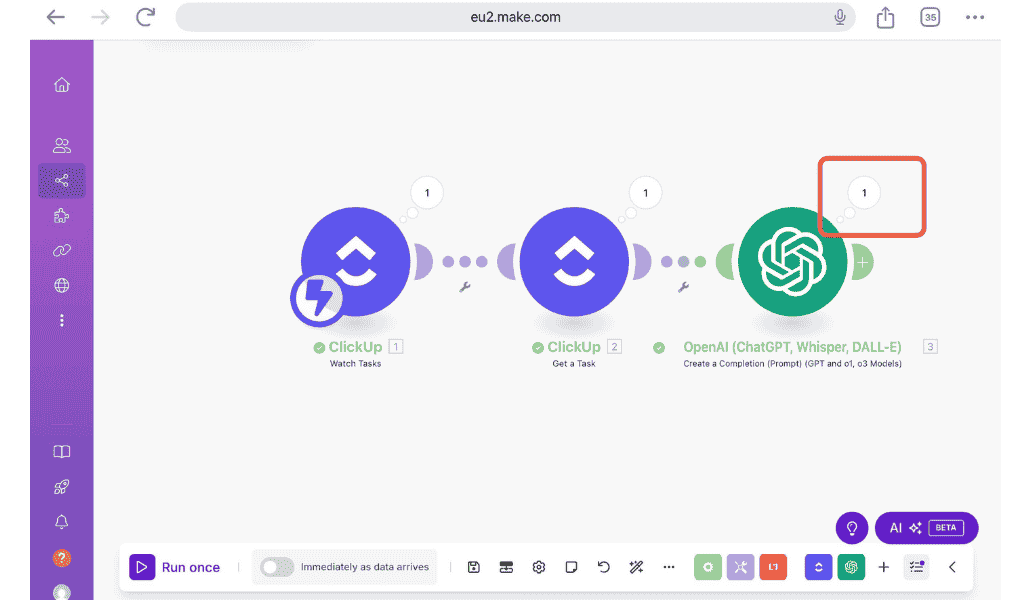
Step 23: Now click again the + icon to add next tool in this make.com automation.
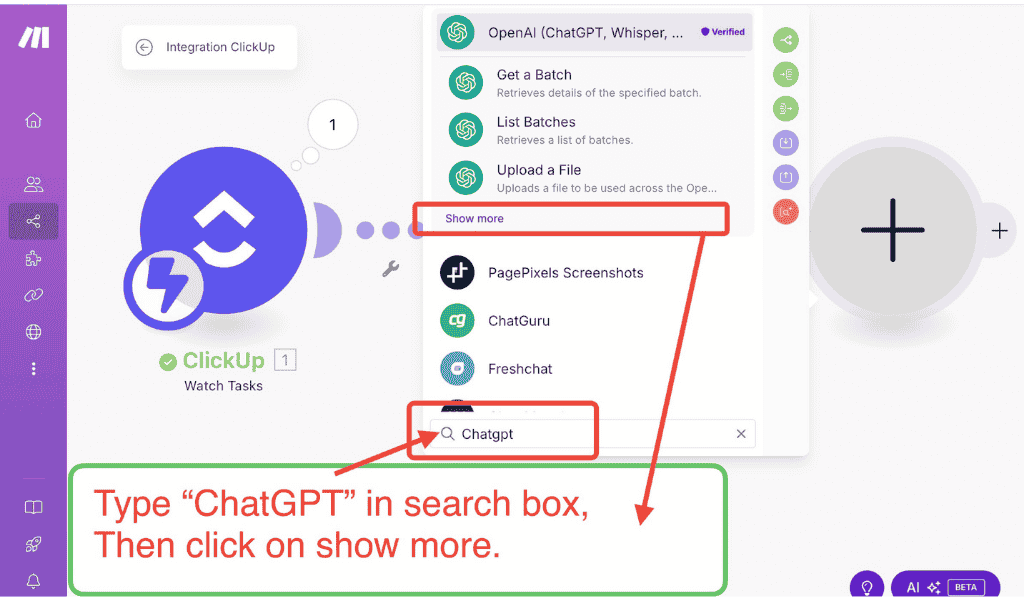
Step 24: Search ChatGPT and click on Show more.
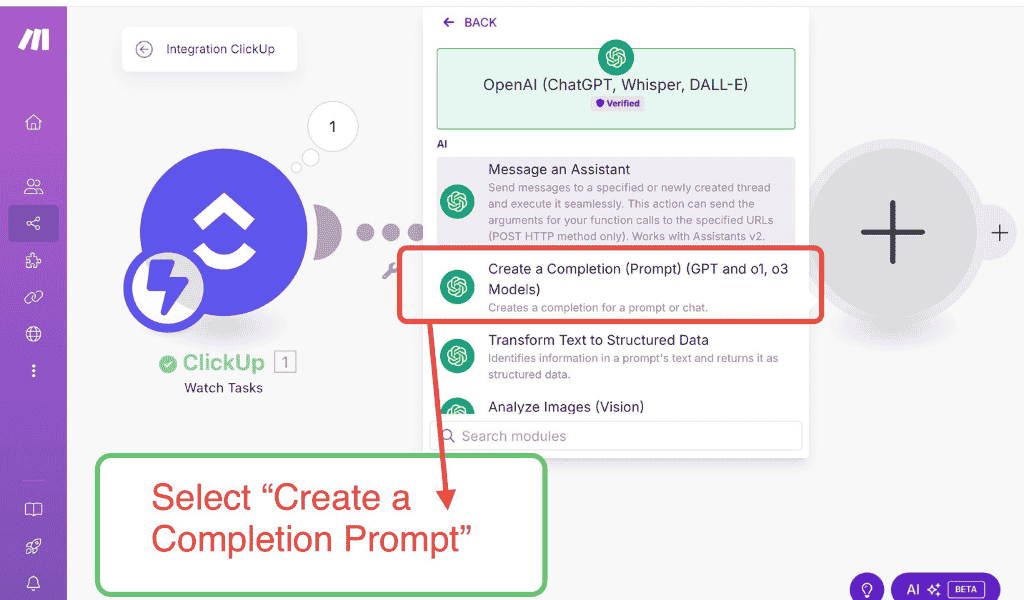
Step 25: Click to select the Create a Completion (Prompt) (GPT and 01, 03 models).
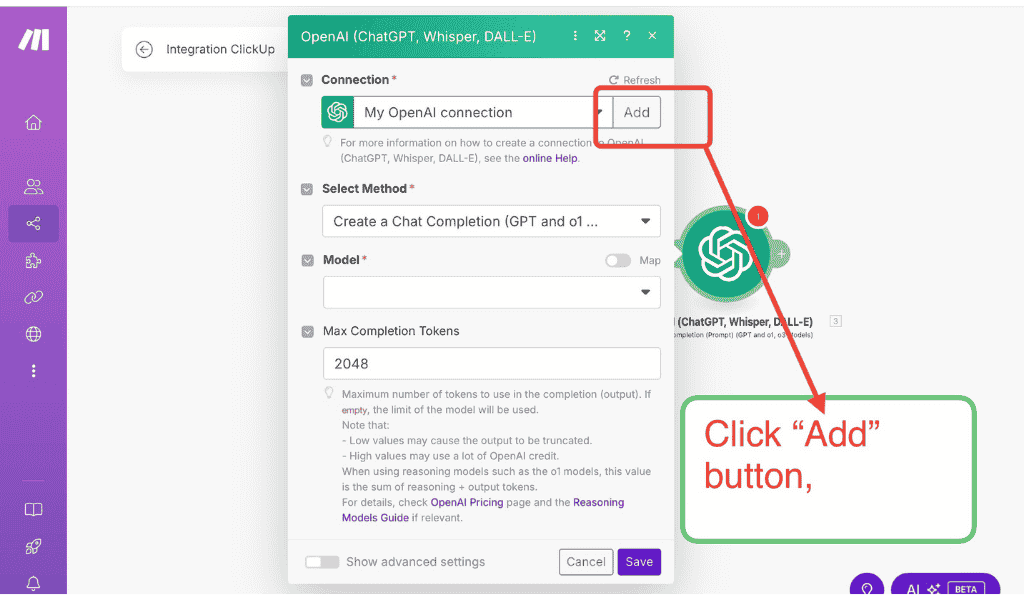
Step 26: Click Add button, as shown in image.
Step 27: Now you have required ChatGPT API Key, to connect it with Make.
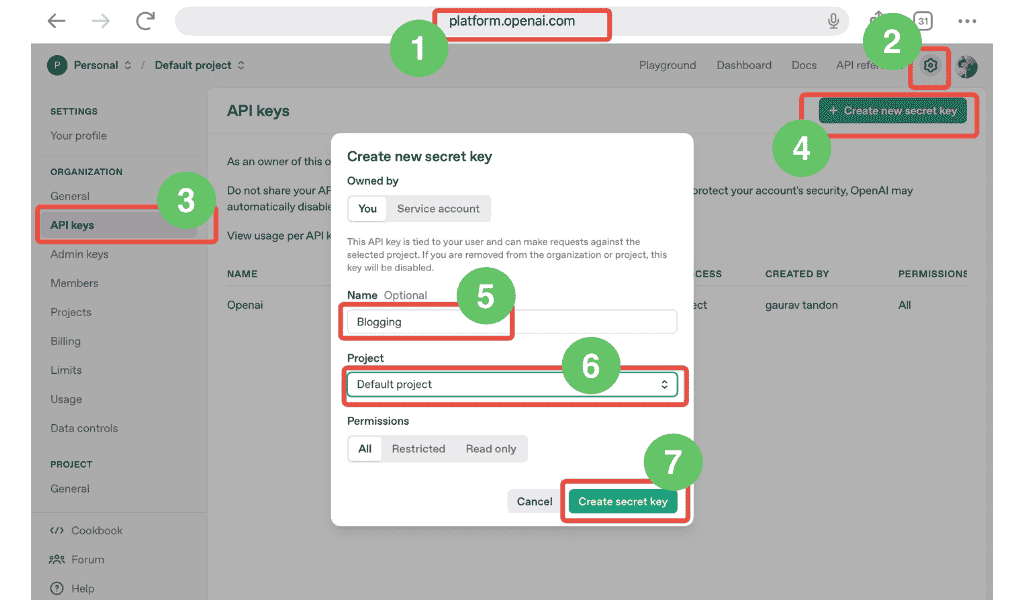
Step 28: Follow this step to get API: (For reference you can see the image given below) 1. Open platform.openai.com, 2. Click on Setting icon, 3. Click on option API Keys from its sidebar. 4. Click Create new secret key. 5. Type name, 6. Select Project, 7. Click on Create Secret Key.
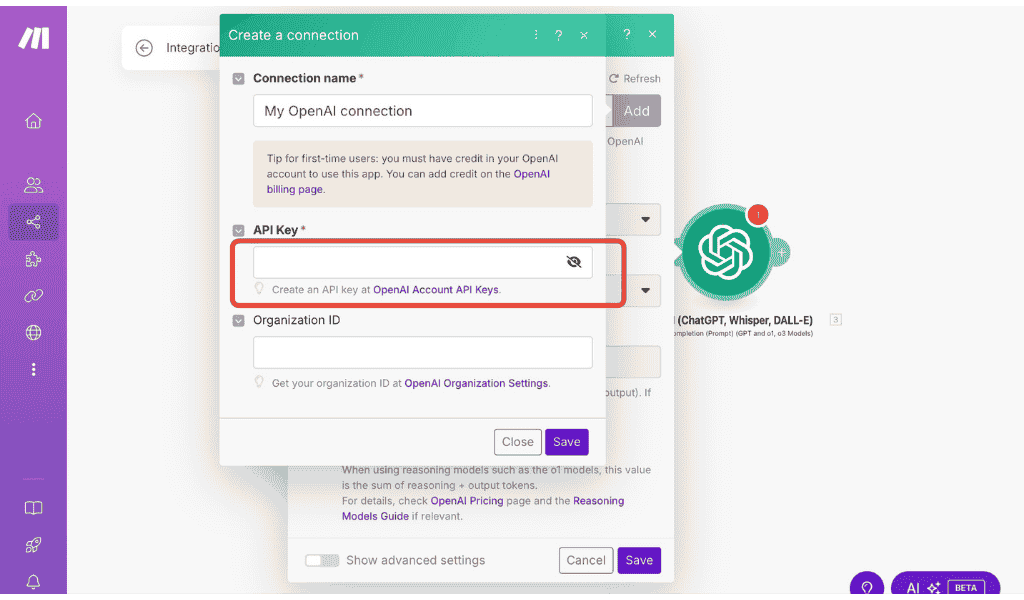
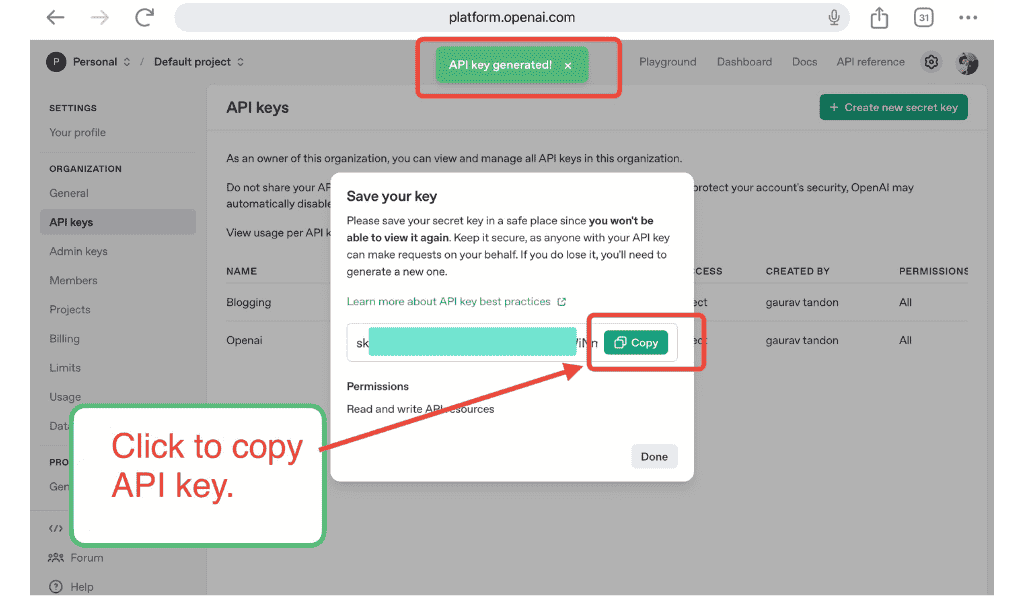
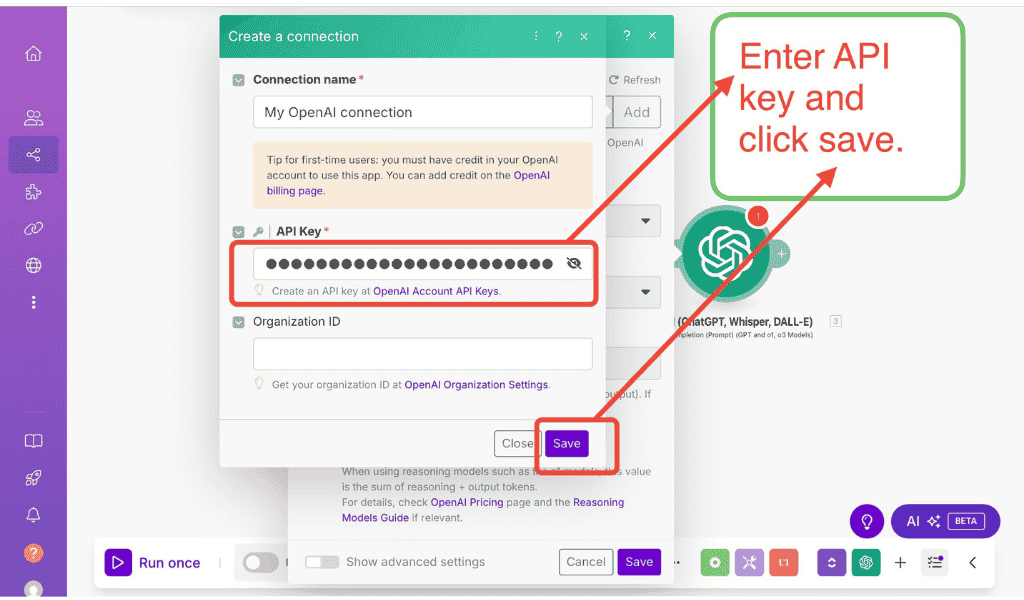
Step 29: Click Copy to copy API Keys.
Step 30: Paste API key back in the Make.com and click Save.
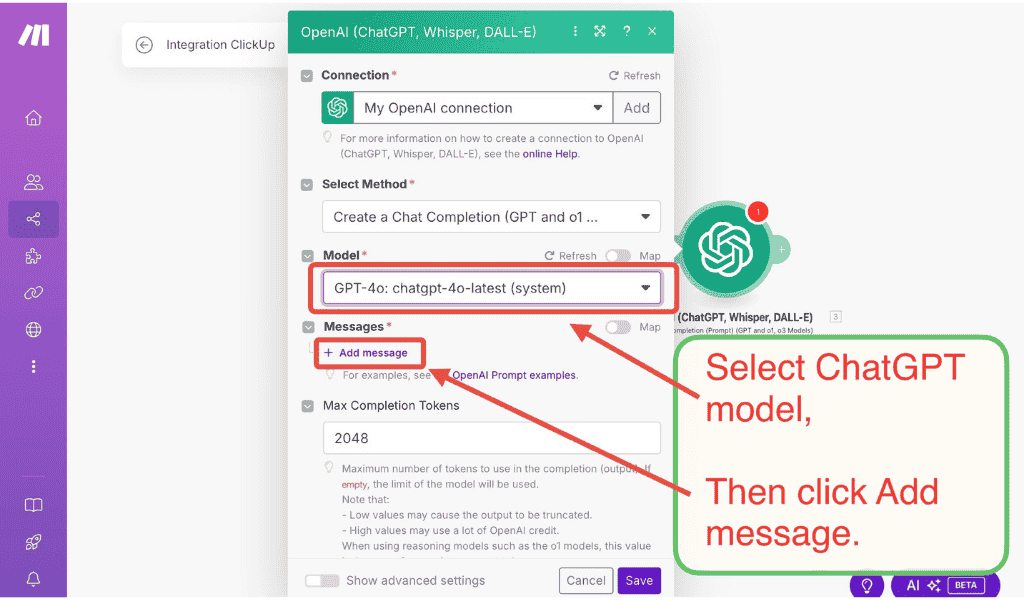
Step 31: Select Model of your choice and click on Add message.
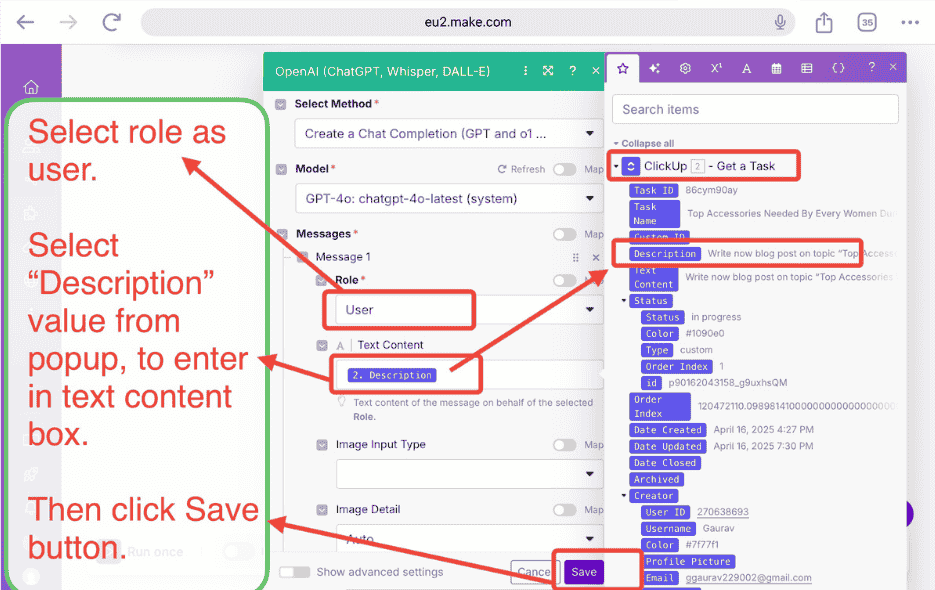
Step 32: Select User from drop down, and in Text Content select a dynamic value Description from the popup.
Click on Save button.
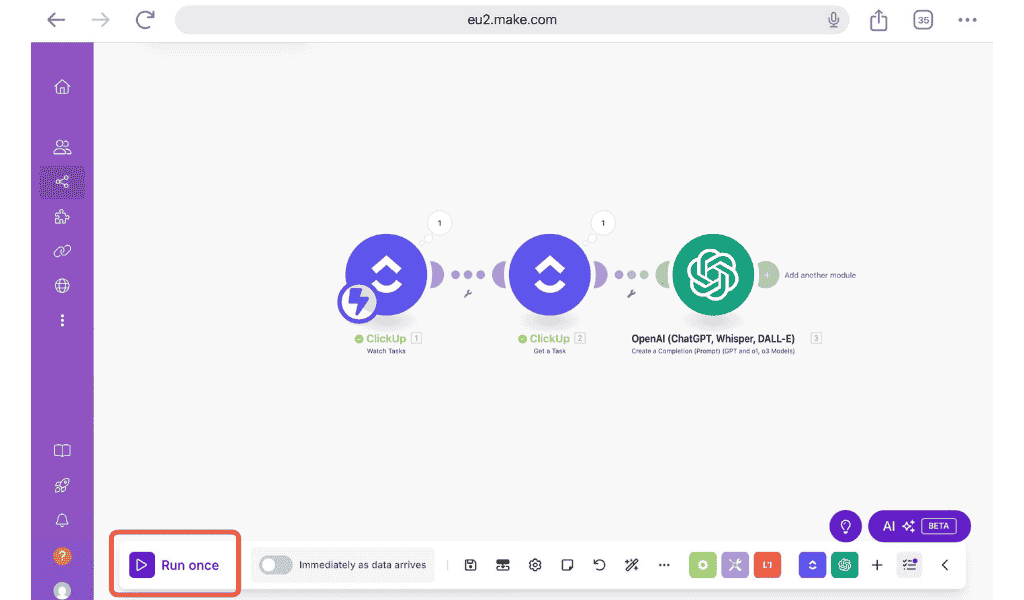
Step 33: Click the button Run once.
Step 34: Like before Change the Status from To Do to In Progress.
Step 35: Like before Click Notification icon.
Step 36: And as you can see ChatGPT successfully generated a blog post content using the clickup Description, it means ChatGPT is now successfully connected with Clickup and Make.com.
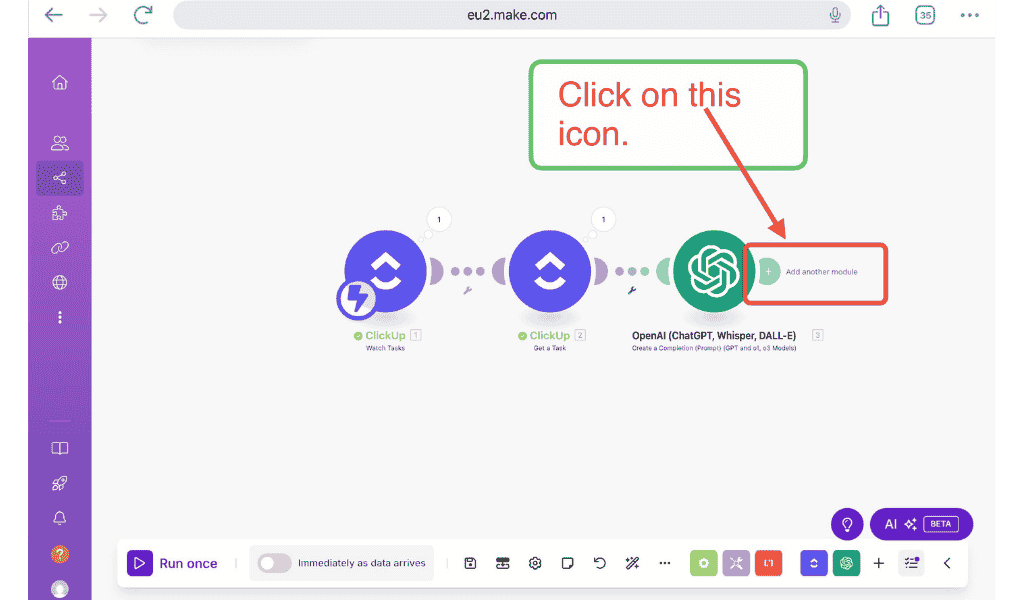
Step 37: Click + icon now to connect new tool.
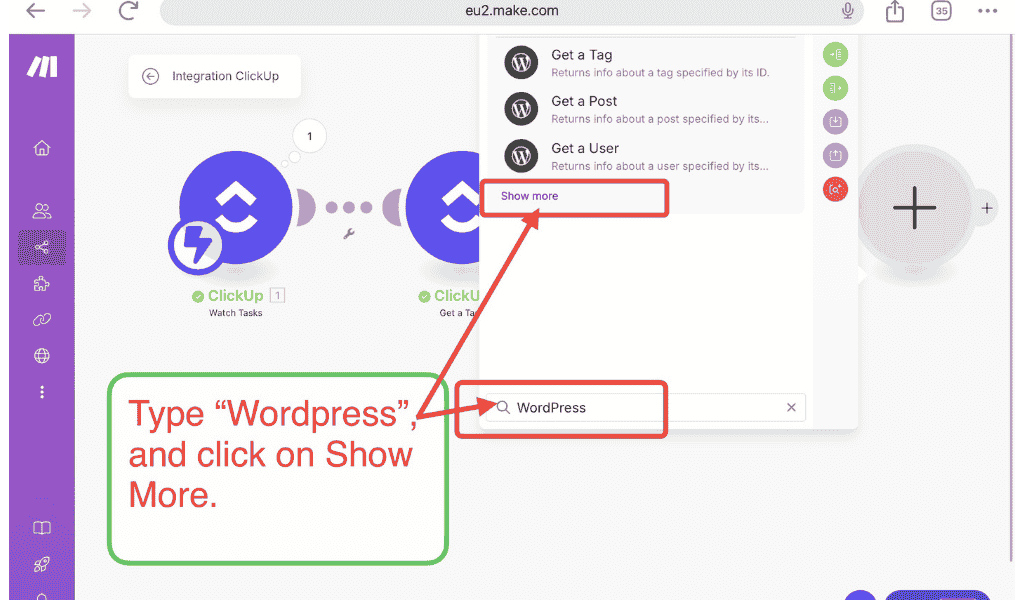
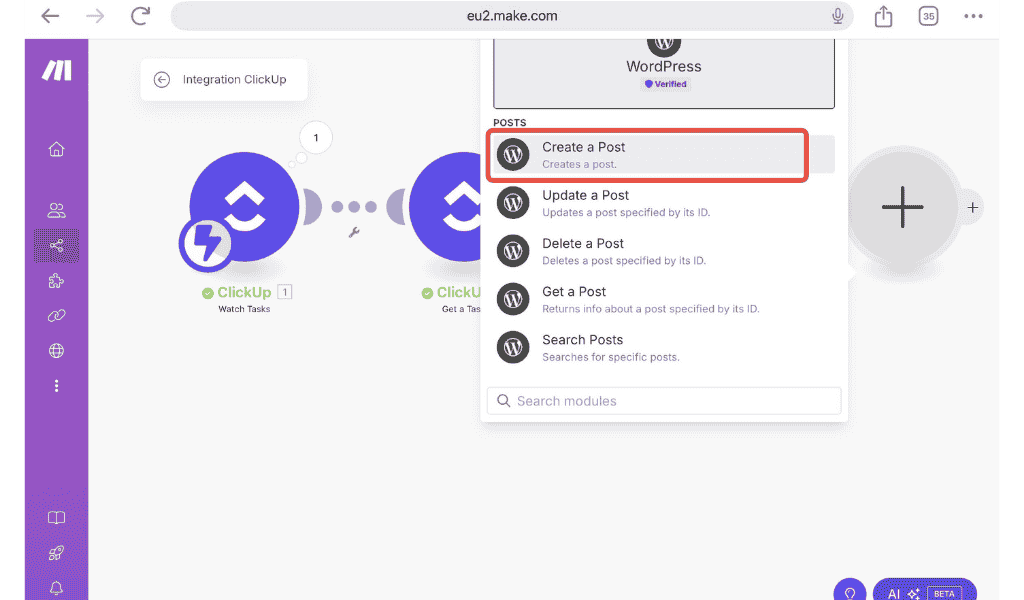
Step 38: Search WordPress and click on Show More.
Step 39: Click on Create a Post.
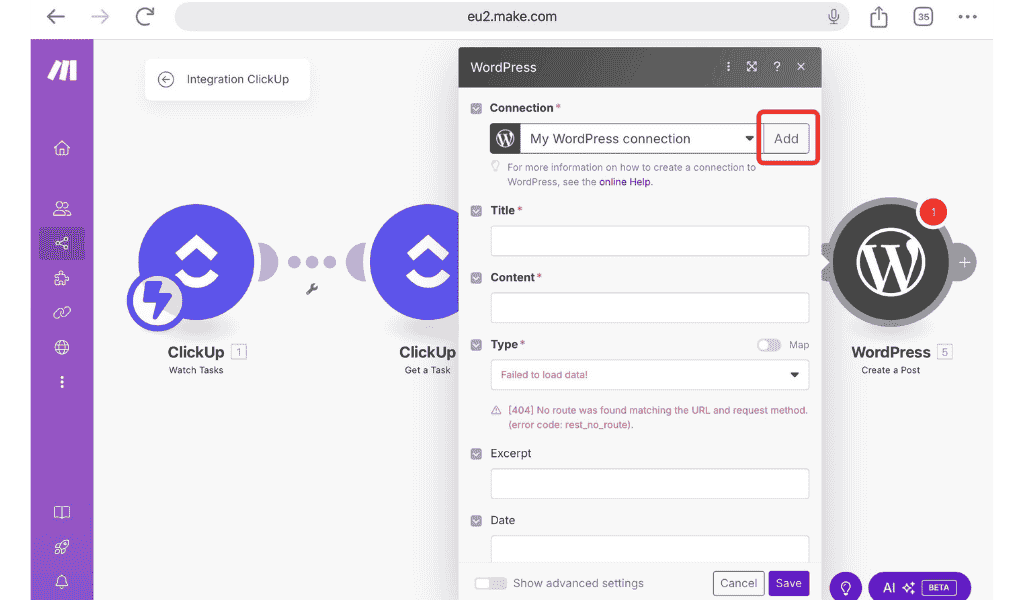
Step 40: Click Add to connect Make with WordPress.
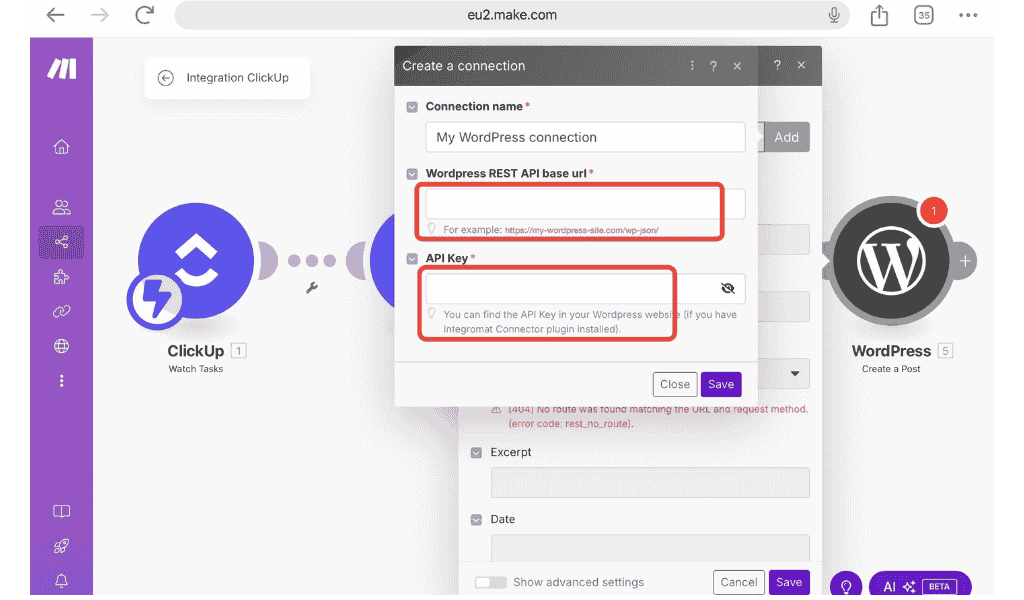
Step 41: We need WordPress Rest API base url and API Key.
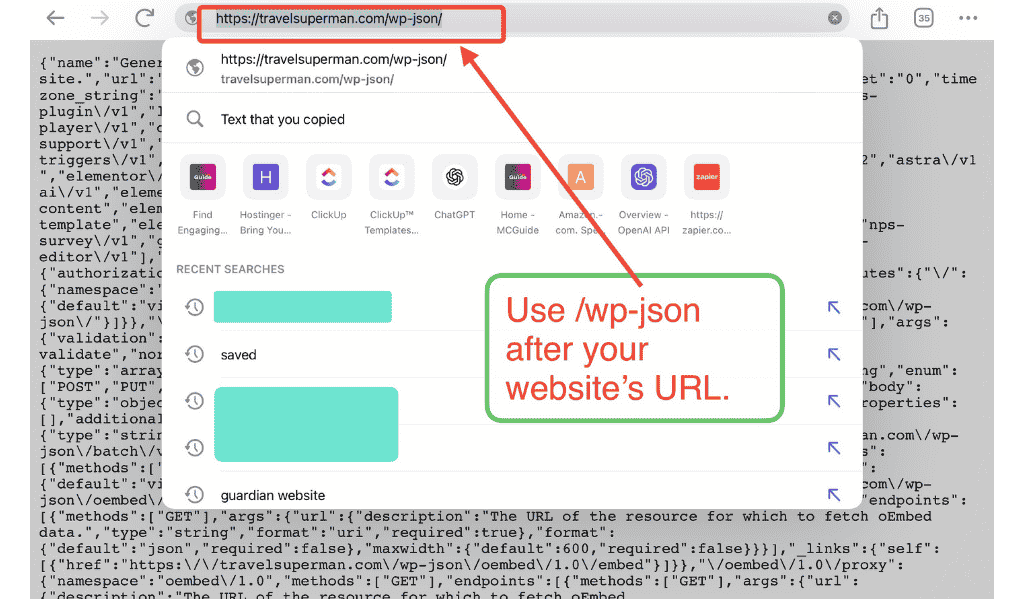
Step 42: Simple go to your website home page and add /wp-json, it is going to look like https://yourwebsite.com/wp-json, look image given below, our website Rest API base url is https//travelsuperman.com/wpjson.com, and you can see some weird data is written on page, this url is what we need, if you have some special plugin installed your content might look different.
Copy this web url.
Step 43: For API Key you,have to go to your websites Plugins > Add New Pluging > then search make in search.
Step 44: Scroll down you will find Make Connector plugin, click on install and Activate this Plugin Now.
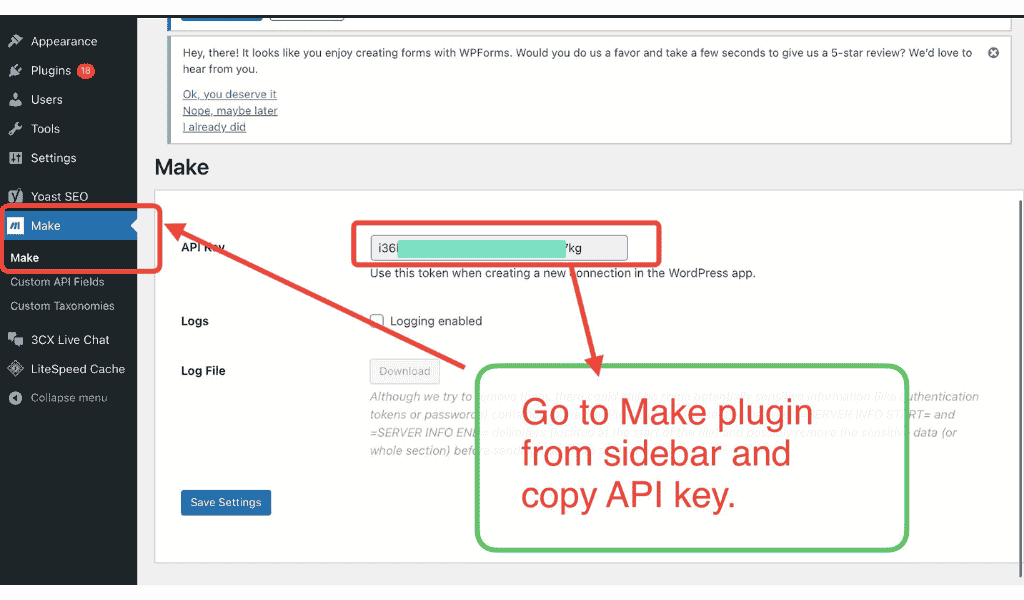
Step 45: After activation you will find Make option in sidebar, click on Make and copy given API Key.
Step 46: Paste the copied Rest API base URL and API Key and Click this Save button.
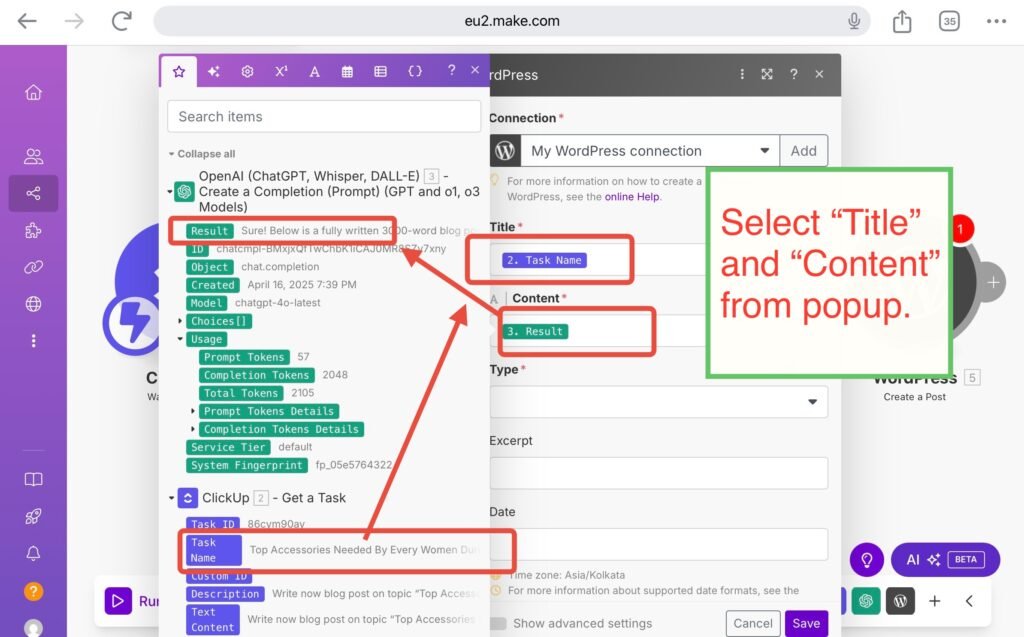
Step 47: Select dynamic values For Title select Task Name from clickup, and For Content select the Result from this ChatGPT popup.
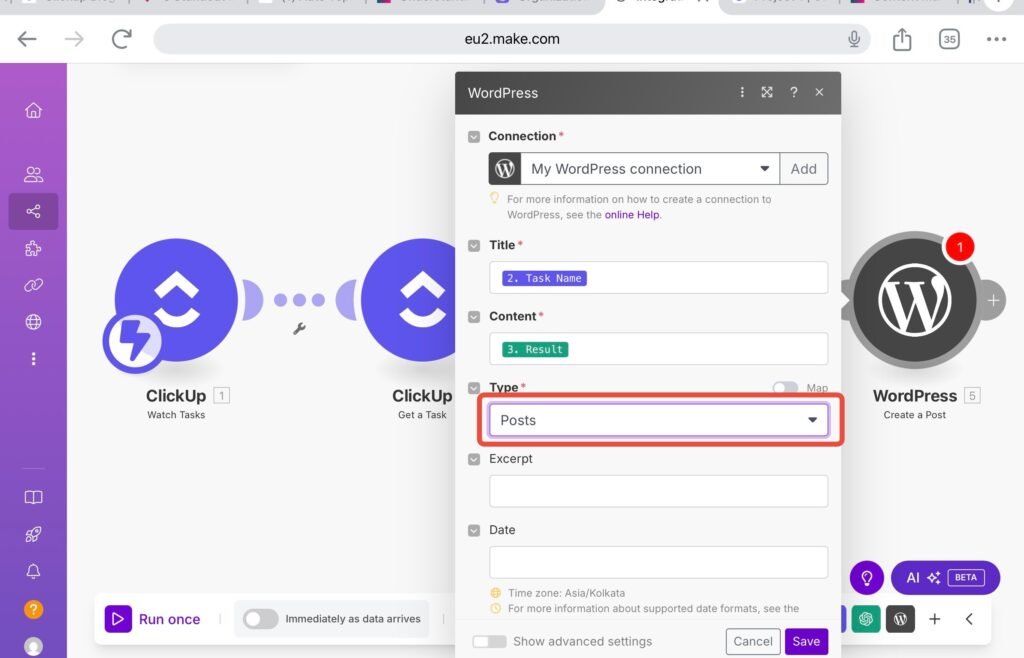
Step 48: Select Post in Type then click Save.
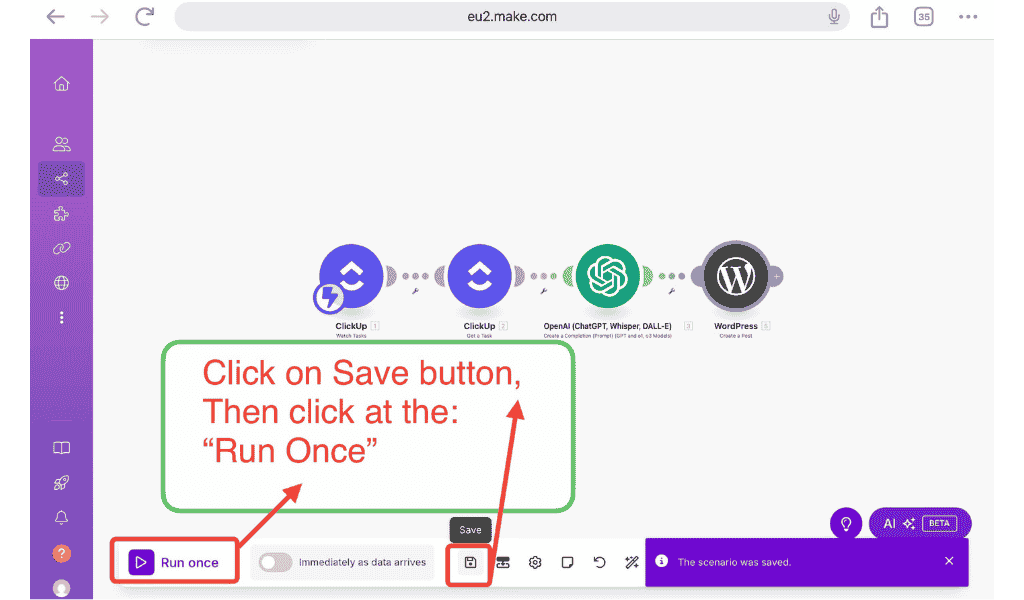
Step 49: Then finally Save all progress snd click on Run once button.
Step 50: Like before Change Status from Clickup.
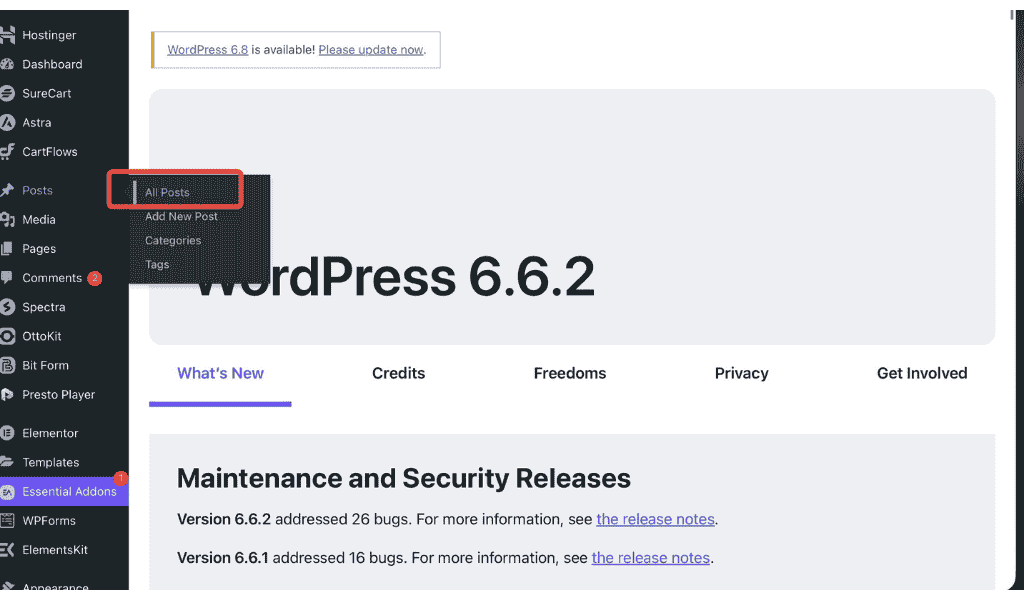
Step 51: After this wait for 1 minute, and then go to your wordpress posts, Goto All Posts.
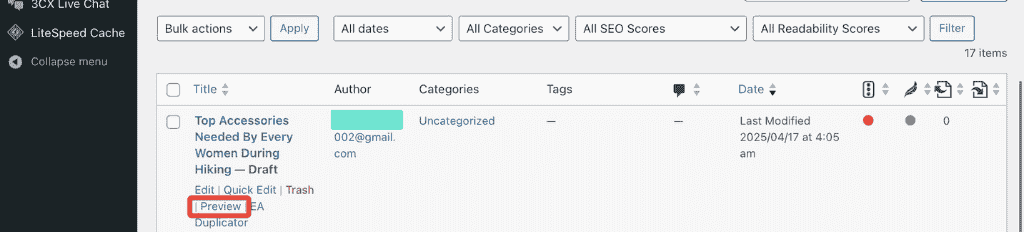
After automation has completed your post should have automatically written and uploaded, to find, Check latest blog post In All posts and click Preview.
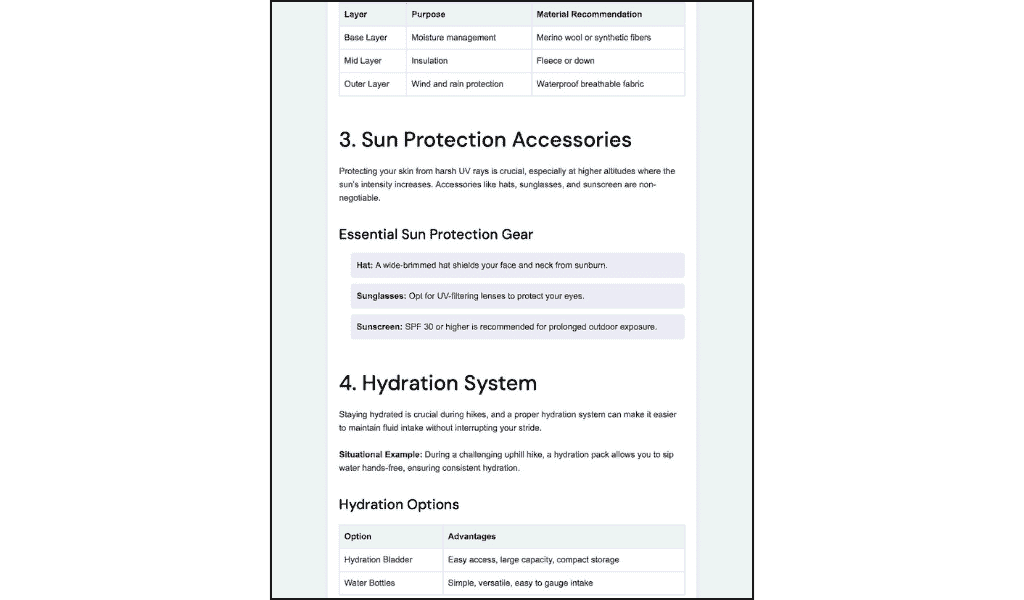
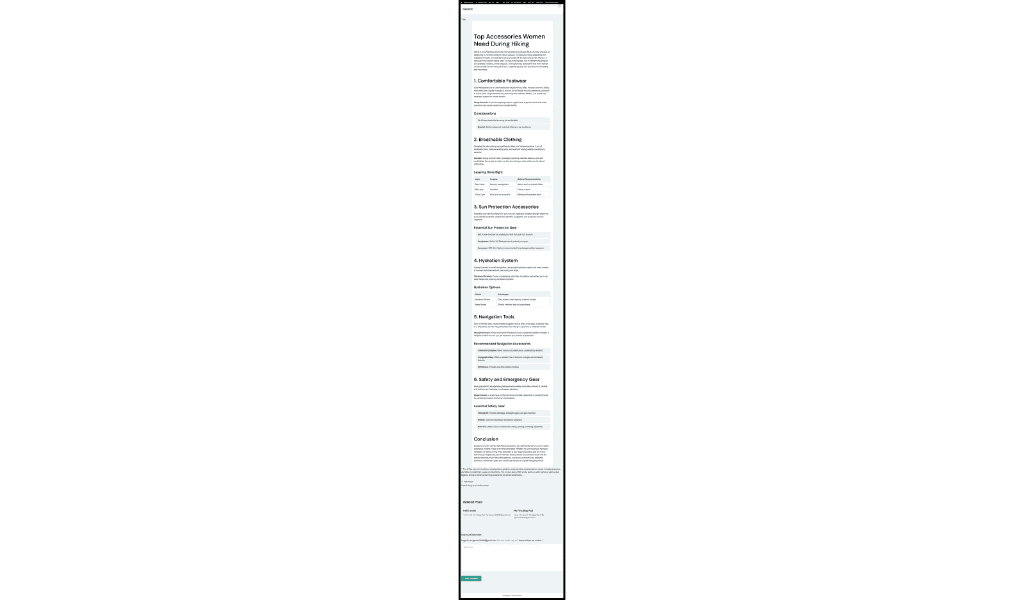
You will get blog post something like below, these image showing the blog post we have generated using the same Automation process.
You can set 30 or 100s of Topic and description in Clickup and this automation will automatically create and post a blog-post every day for months without any human intervention, you will not even have to change the status in Clickup as in Clickup you can set change Status Automatically everyday.
So start now making blog-office if you haven’t made already, then try different types of Automation in make, like convert your blog posts into social media posts or Automate email generation and also publishing.